How to Calculate Fill Dirt
1. Measure Shape
Select Rectangle, Circle, or Wedge (Slope). Measure length, width, and depth in feet/inches.
2. Set Compaction
Fill dirt settles. Use our Custom Compaction Adjuster to add 10-30% extra volume based on your needs.
3. Get Totals
See exact Cubic Yards, Tons, and Coverage Area. We include a dynamic compaction estimate row.
Professional Grade Calculator
Enter your dimensions below. Our tool automatically accounts for standard density, but you can adjust everything.
Pro Fill Dirt Calculator
Accurate estimates for Yards, Tons, & Compaction
Results
Specialized Calculators
Have a unique project? Use our specialized tools below for specific shapes, materials, and use cases.
Guides & How-To's
Master your excavation and landscaping projects with our step-by-step guides.
How Much Dirt to Fill a Raised Bed Calculator
Calculate exactly how much dirt you need for your raised bed. Free calculator + expert guide on soil depth, mix ratios, bag counts, and cost-saving tips.
How to Calculate Fill Dirt Coverage
Learn how to calculate fill dirt coverage accurately with our step-by-step guide. Includes calculator, formulas for all shapes, compaction factors, and cost-saving tips.
How to Calculate Dirt for Holes
Learn how to calculate how much dirt to fill a hole with our step-by-step guide. Includes formulas for all hole shapes, worked examples, and a free calculator. Get accurate cubic yard measurements now.
Why Calculation Accuracy Matters
Save Money
Ordering just 2 extra yards can cost $100+. Our exact "Tons" and "Yards" output helps you order precisely.
Avoid Delays
Running short stops your project cold. Our Custom Compaction Adjuster ensures you have enough material to pack it down solid.
Sample Output
"The only calculator that accurately handled my driveway slope!" - James T.
📑 Table of Contents: Calculate Yards of Fill Dirt
Understanding Fill Dirt: The Foundation of Your Project
Ever stood in your backyard, staring at an uneven patch of land, wondering how much dirt you'll actually need to fix it? You're not alone. Thousands of homeowners and contractors face this exact question every single day. And here's the kicker: getting it wrong can cost you hundreds, even thousands of dollars in wasted material or project delays.
Fill dirt is essentially the unsung hero of construction and landscaping projects. It's the stuff that literally fills the gaps, levels the ground, and creates stable foundations for everything from patios to driveways. But unlike topsoil, which is rich in organic matter and perfect for growing plants, fill dirt is all about structure and stability. Think of it as the skeleton beneath your project's skin.
Now, you might be thinking, "Can't I just eyeball it?" Well, you could, but that's like trying to bake a cake without measuring ingredients. Sure, you might get lucky, but more often than not, you'll end up with something that doesn't quite work. Professional contractors know this secret: precision in calculating fill dirt separates successful projects from expensive disasters.
Why Accurate Calculation Matters
Pro Tip
Professional contractors add a 10-15% buffer to their calculations as insurance against running short. It's cheaper to have a small pile left over than to pay for a second delivery!
Let's talk real numbers for a second. Imagine you're leveling a 20x30 foot area that's got a 6-inch dip. Eyeball it, and you might order 10 cubic yards. Do the math properly, and you'll need closer to 13 yards when you factor in compaction. That 3-yard difference? That's anywhere from $150 to $300 depending on your location. And that's just for one small area!
But it's not just about avoiding over-ordering. Under-ordering is actually worse. Picture this: your delivery truck shows up, dumps the dirt, the crew spreads it out, and... you're short. Now you've got to order more, pay another delivery fee, stop work until it arrives, and probably pay your crew to stand around waiting. Suddenly, that "small miscalculation" has cost you three times what the extra dirt would have.
The professionals I've talked to over the years all say the same thing: measure twice, order once. It's not just a saying; it's a survival strategy in the construction business. The best contractors will actually add a buffer of 10-15% to their calculations just to make sure they never run short. Smart, right?
Cost Implications of Getting It Wrong
Here's where things get interesting. Fill dirt typically costs between $10 and $50 per cubic yard, depending on your location and the quality you need. Delivery fees can add another $50 to $150 per trip. So if you miscalculate and need a second delivery, you're basically doubling your transport costs.
But wait, there's more! (I sound like a TV infomercial, don't I?) If you over-order, you've got disposal costs to worry about. Some municipalities charge for dirt removal, others require special permits. And if you're on a residential property, good luck finding space to pile it until you figure out what to do with it. Your neighbors will love that dirt mountain in your driveway.
The smartest approach? Use a reliable calculator, understand the factors that affect your needs, and add a reasonable buffer. It's not rocket science, but it does require paying attention to the details. And that's exactly what we're going to help you master.
How to Calculate Fill Dirt: Step-by-Step Guide

Alright, let's roll up our sleeves and dive into the actual math. Don't worry, I promise to keep this as painless as possible. Think of this as a recipe – follow the steps, and you'll get perfect results every time.
Measuring Your Area Correctly
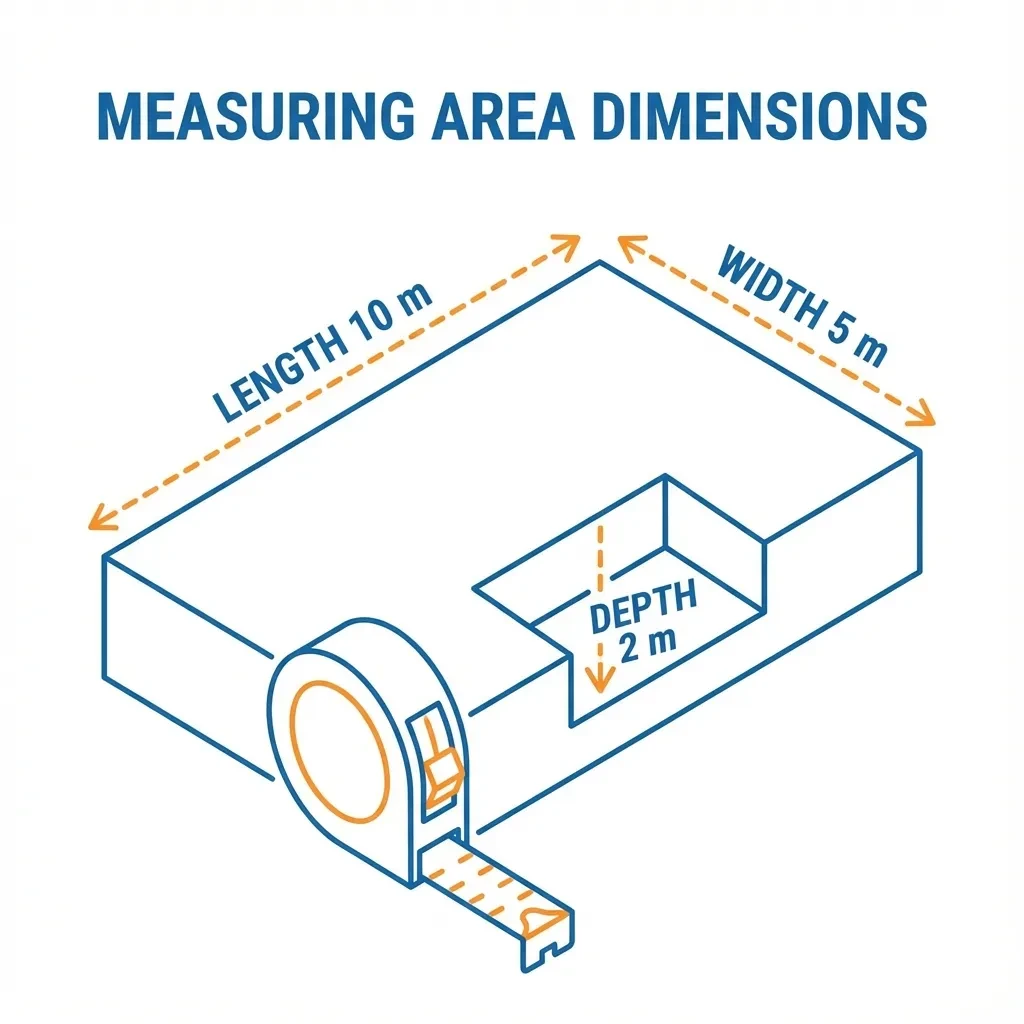
First things first: grab a tape measure. Not a rough estimate, not pacing it out with your feet (unless you're a trained surveyor, and even then, use a tape measure). For rectangular areas, you need three measurements: length, width, and depth. Sounds simple, right? But here's where people mess up.
Common Mistake Alert
The #1 mistake: mixing feet and inches! Always convert everything to the same unit before calculating. 6 inches = 0.5 feet, not 6 feet!
Always measure in the same units. If you're measuring feet for length and width, measure depth in feet too. The number one mistake I see? People measure length and width in feet but depth in inches, then wonder why their calculations are wildly off. Pro tip: if your depth is in inches, divide by 12 to convert to feet. So a 6-inch depth becomes 0.5 feet.
For irregular shapes, break them down into smaller rectangles or triangles. It's like eating an elephant (not that we recommend that) – one bite at a time. Calculate each section separately, then add them all together. This might take an extra 10 minutes, but it'll save you hours of headache later.
Different Shapes, Different Formulas
Not all projects are nice, neat rectangles. Life would be boring if they were, right? Here's your cheat sheet for common shapes:
Rectangle
L × W × D ÷ 27 = Cubic Yards
Circle
π × R² × D ÷ 27 = Cubic Yards
Slope/Wedge
(L × W × Avg D) ÷ 2 ÷ 27 = CY
Rectangular areas: Length × Width × Depth = Volume in cubic feet. Divide by 27 to get cubic yards. Why 27? Because there are 27 cubic feet in a cubic yard (3 feet × 3 feet × 3 feet). See, math can be useful!
Circular areas: π × (Radius²) × Depth. Remember that radius is half your diameter. So if you've got a circular pond that's 10 feet across, your radius is 5 feet. And π? Just use 3.14 unless you're building a NASA project.
Sloped or wedge-shaped areas: This is where it gets tricky. For a slope, you'll use (Length × Width × Average Depth) ÷ 2. The average depth is your deepest point plus your shallowest point, divided by 2. Think of it like finding the middle ground – literally.
Here's a real-world example: You're filling a driveway approach that slopes from the street to your garage. At the street, you need 12 inches of fill. At the garage, you need 0 inches. Your average depth is 6 inches (0.5 feet). If the area is 15 feet long by 10 feet wide, you'd calculate: 15 × 10 × 0.5 ÷ 2 = 37.5 cubic feet, or about 1.4 cubic yards.
Depth Considerations
Depth is trickier than you might think. You can't just look at your low spot and measure down. You need to think about what's underneath and what you're trying to achieve. If you're leveling a yard, you want to bring everything up to your highest point, right? That means measuring from your lowest point to your desired final grade.
But here's the twist: if you're filling more than 12 inches, you should plan to fill in layers. Each layer should be 6-8 inches maximum, and you need to compact between layers. Why? Because dumping 3 feet of dirt all at once is basically creating a future sinkhole. Dirt settles unevenly when it's piled too deep, and you'll end up with serious drainage and stability problems.
Think of it like making lasagna. You don't just dump all the cheese in one spot – you layer it. Same principle with fill dirt. Layer, compact, repeat. It takes longer, but your project will actually stay level for years instead of months.
The Compaction Factor: Why You Need More Than You Think
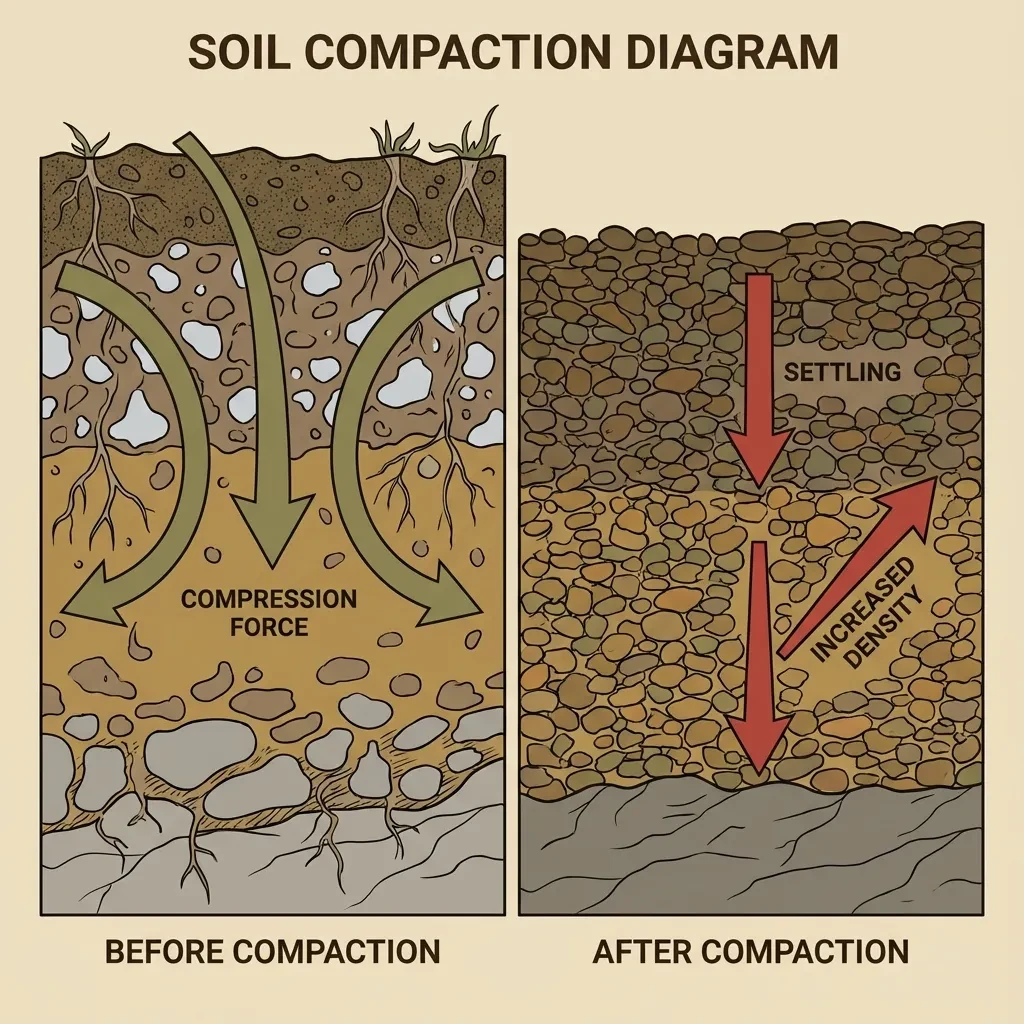
What Is Soil Compaction?
Okay, so you've calculated your volume perfectly. You're feeling pretty good about yourself. Then your contractor buddy tells you to add 20% for compaction, and you're like, "Wait, what?" Let me explain why this is absolutely critical.
When fill dirt is delivered, it's loose and fluffy – full of air pockets. It's like the difference between a bag of chips and the same bag after your kid sits on it. That "settling" is compaction, and it's going to happen whether you plan for it or not. The question is: do you want to plan for it now, or discover you're short halfway through your project?
Compaction happens through a combination of mechanical force (like running a compactor over it) and time (gravity doing its thing). Professional projects use mechanical compactors to speed up the process and ensure uniformity. Even with mechanical compaction, you'll see some settling over time. That's why smart contractors always add extra.
Standard Compaction Percentages
Compaction Quick Reference
Light (walkways, landscaping)
Medium (driveways, pathways)
Heavy (foundations, structures)
Here's your rule of thumb: add 15-30% to your calculated volume to account for compaction. The exact percentage depends on several factors:
Light compaction (10-15%): This is for areas that won't see much weight or traffic, like filling in around landscaping or building up planting beds. Basically, anywhere a human might walk but a car won't drive.
Medium compaction (15-20%): This is your sweet spot for most residential projects. Driveways, pathways, shed foundations – anything that needs to be stable but isn't supporting a building. Most DIY projects fall into this category.
Heavy compaction (20-30%): This is for serious structural work. Building foundations, retaining wall backfill, or areas that'll support vehicles. You're not playing around here – this dirt needs to be rock solid.
Want to know a professional secret? Commercial projects often spec 95% compaction density. That means the finished, compacted dirt is 95% as dense as it would be if you could somehow remove every air pocket. To achieve that, they often need to order 25-30% more material than the "nominal" volume. The math can be counterintuitive, but it works.
Let's make this concrete (pun intended). Say you calculated you need 10 cubic yards of fill dirt for a patio base. With 20% compaction factor, you should order 12 cubic yards. That extra 2 yards? That's your insurance policy against running short. And trust me, that $100 extra is way cheaper than a second delivery and project delay.
Converting Cubic Yards to Tons
Here's where things get a bit wonky, and it trips up even experienced contractors sometimes. Fill dirt is sold two ways: by volume (cubic yards) or by weight (tons). Your calculation gives you volume, but what if your supplier quotes by weight? Time to convert!
The standard conversion is approximately 1.3 tons per cubic yard for fill dirt. But – and this is a big but – that number can vary wildly depending on what kind of dirt we're talking about and how wet it is.
Weight Variations by Soil Type
| Soil Type | Dry (tons/yard) | Wet (tons/yard) |
|---|---|---|
| Clean Fill | 1.2 - 1.4 | 1.6 |
| Clay-Heavy Fill | 1.4 - 1.6 | 1.8 |
| Sandy Fill | 1.2 - 1.35 | 1.5 |
Clean fill dirt: This is your basic, screened dirt with rocks and organic matter removed. It typically weighs 1.2 to 1.4 tons per cubic yard when dry. Get it wet, and it can go up to 1.6 tons per yard. That's a 33% weight increase from moisture alone!
Clay-heavy fill: Clay is dense stuff. We're talking 1.4 to 1.6 tons per cubic yard when dry, and up to 1.8 tons when wet. This is why clay makes such good fill for foundations – it's heavy, it compacts well, and it doesn't shift much once it's in place.
Sandy fill: Sand is lighter, usually 1.2 to 1.35 tons per cubic yard. It also compacts less than clay, which is why it's often used in drainage applications. Water flows through it instead of pooling on top.
Why does this matter? Because if you order 10 cubic yards of wet, clay-heavy fill, you could be looking at 16-18 tons showing up on your driveway. Make sure your driveway can handle that weight! I've seen driveways crack under the weight of dirt deliveries because nobody thought about the load bearing capacity. Don't be that person.
Pro tip: When talking to suppliers, always clarify whether they're quoting cubic yards or tons, and ask about the moisture content. A good supplier will know this information off the top of their head. If they don't, find a different supplier. Seriously.
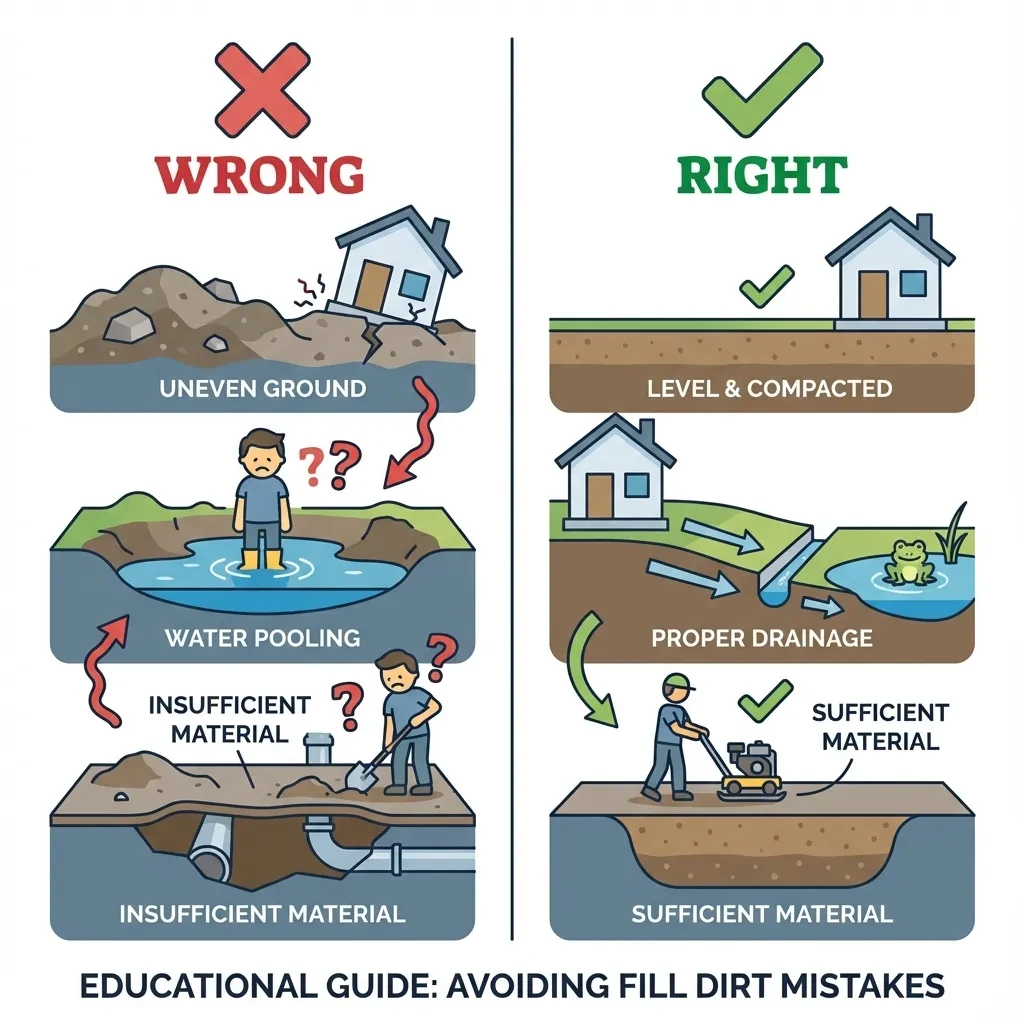
Common Mistakes to Avoid
Let's talk about the mistakes that keep me up at night – not because I make them anymore, but because I see others making them all the time. Learn from other people's expensive lessons instead of paying tuition yourself.
Underestimating Compaction
This is the big one. I cannot stress this enough: fill dirt will compact. It will settle. It will take up less space than you think. I've seen projects where someone calculated their volume perfectly, ordered exactly that amount, spread it out, compacted it, and... came up a foot short. Why? They forgot to account for compaction.
Here's an analogy: imagine you're packing peanuts into a jar. At first, they pile up nice and fluffy. Then you shake the jar, and they settle down. Shake it more, they settle more. That's compaction in action. Except with dirt, you can't just open another bag – you need another delivery truck.
The fix? Always, always, ALWAYS add your compaction factor. Even if you think you won't need it. Even if your area doesn't look that deep. Add it anyway. You can always find a use for extra dirt. You can't conjure dirt out of thin air when you run short.
Wrong Measurement Units
This one seems so simple, but it causes so many problems. Mixing feet and inches in your calculations is like mixing up left and right turns while driving – you'll end up somewhere completely unexpected. And by "unexpected," I mean with way too much or way too little dirt.
Here's what happens: someone measures a driveway at 50 feet long, 12 feet wide, and 4 inches deep. Then they multiply 50 × 12 × 4 and think they need 2,400 cubic feet of dirt. Divide by 27, and they order about 89 cubic yards. Whoops! They forgot to convert inches to feet. The actual calculation should be 50 × 12 × 0.33 feet (4 inches), which is 198 cubic feet, or about 7.3 cubic yards. That's not even close!
The solution? Pick one unit and stick with it. I recommend feet for everything because that's what cubic yard calculations use. Convert all your inches to decimal feet right at the start. 3 inches = 0.25 feet. 6 inches = 0.5 feet. 9 inches = 0.75 feet. Write it down, double-check it, then do your math.
Another common mistake is forgetting about irregular shapes. Not every fill area is a perfect rectangle. Maybe you've got a curved garden bed, or an L-shaped foundation fill. Don't try to calculate these as one big irregular shape – you'll drive yourself crazy. Break them into smaller, simpler shapes, calculate each one, then add them up. It's a bit more work upfront, but it's way more accurate.
Projects That Require Fill Dirt
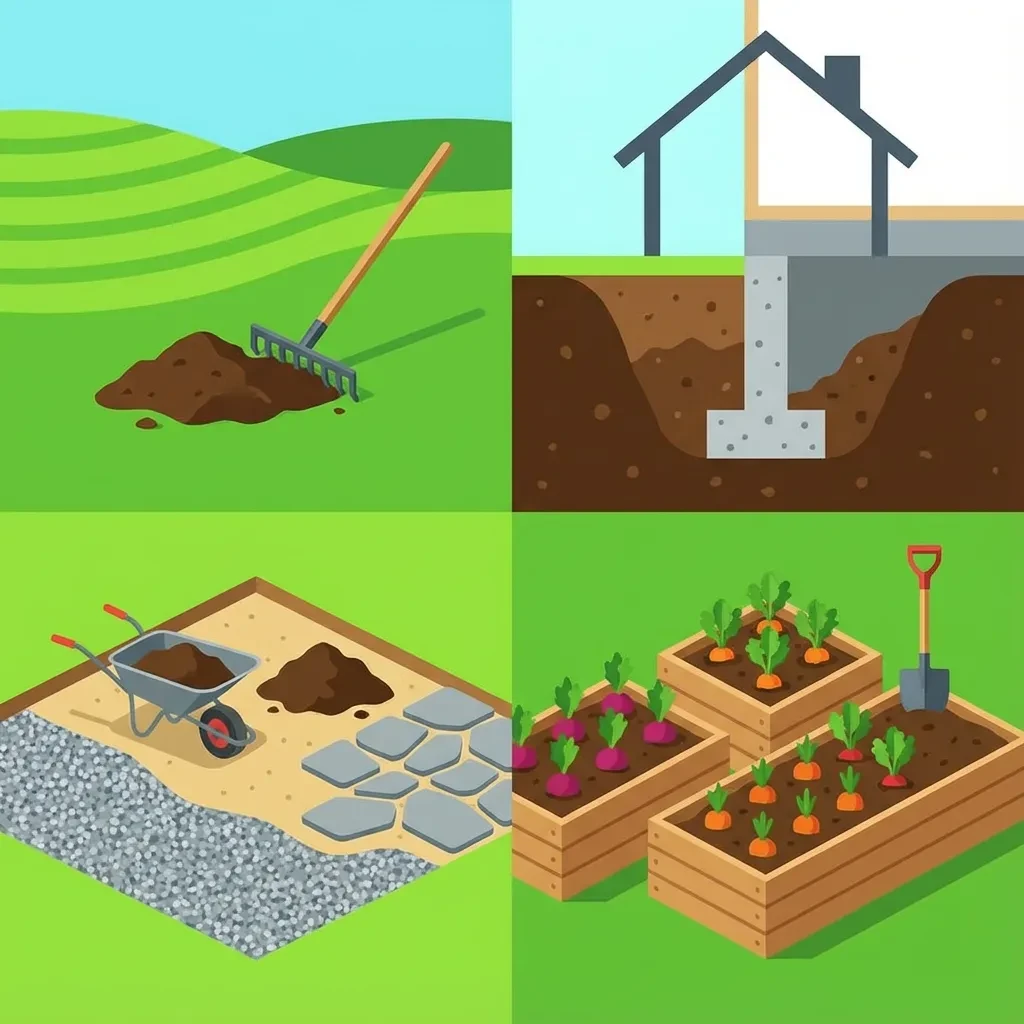
So when exactly do you need fill dirt? Let's run through the most common scenarios. Chances are, if you're reading this, you're dealing with one of these situations right now.
Yard Leveling and Grading
Got a lumpy yard that makes mowing a nightmare? Water pooling in weird spots after every rain? That's a grading problem, and fill dirt is your solution. Proper yard grading means water flows away from your house instead of toward it (and into your basement).
The trick with yard leveling is figuring out where your high points and low points are. You want a gentle slope – about 1-2% grade is ideal. That means for every 100 feet of distance, your yard should drop 1-2 feet. Too flat, and water pools. Too steep, and you'll erode your topsoil faster than you can say "erosion."
For a typical residential yard leveling project, you might need anywhere from 5 to 50 cubic yards of fill dirt, depending on how uneven things are. I once worked on a property that needed 75 yards just to fix the back half-acre. It looked fine to the eye, but the laser level told a different story – there were dips and humps everywhere.
Foundation and Construction Work
Building an addition? Putting in a new garage? You're going to need fill dirt. Foundation work often requires bringing the grade up to a certain level, and that's where fill dirt shines. It provides a stable, compact base that won't shift or settle (much) over time.
For foundation work, you absolutely cannot skimp on compaction. This is one area where you want to go heavy on the compaction percentage – think 25-30% minimum. The last thing you want is your new addition settling unevenly because the fill beneath it wasn't properly compacted.
Most foundation projects require engineered fill, which means specific compaction standards and often requiring inspection by the building department. Don't try to DIY this part unless you really know what you're doing. A bad foundation fill job can cause cracks, settling, and expensive repairs down the road.
Landscaping and Garden Projects
Creating raised beds? Building berms for visual interest? Leveling a patio area? All of these need fill dirt. The beauty of landscaping projects is that they're usually more forgiving than structural work. You don't need quite as much compaction, and minor settling isn't the end of the world.
For raised garden beds, you'll typically use fill dirt for the bottom portion, then top it with quality topsoil or garden soil. This saves money (fill dirt is cheaper than topsoil) while still giving your plants what they need. A typical 4×8 foot raised bed that's 2 feet tall needs about 2 cubic yards total – maybe 1.2 yards of fill dirt and 0.8 yards of topsoil on top.
Patio bases are another common use. Before you lay pavers or pour concrete, you need a stable, level base. Fill dirt brings everything to grade, then you typically top it with a layer of gravel for drainage and final leveling. A standard 12×12 patio with a 6-inch base needs about 2.7 cubic yards of fill dirt (plus compaction factor).
Choosing the Right Type of Fill Dirt
Not all fill dirt is created equal. Walk into a landscaping supply yard and ask for fill dirt, and you might get asked, "What kind?" Here's your guide to making the right choice.
Clean Fill vs. Unscreened Fill
Clean fill (also called screened fill): This is fill dirt that's been run through a screen to remove rocks, roots, and debris. It's more expensive, but it's easier to work with and compacts more uniformly. Use this for projects where you need things to be smooth and even – like under a patio or driveway.
Unscreened fill: This is the cheap stuff. It might have rocks, roots, chunks of clay, whatever was dug out of someone's excavation pit. It's fine for rough grading or filling large holes, but you don't want it anywhere near finished work. The price difference is significant – sometimes half the cost of clean fill – but you get what you pay for.
Here's my recommendation: use unscreened fill for the bottom layers if you're filling more than a foot deep, then top it with clean fill for the final 6-12 inches. This gives you the best of both worlds – cost savings on bulk fill, with a nice workable surface layer.
Some suppliers also offer "structural fill" which is engineered to specific standards for load-bearing applications. This is what you want for retaining wall backfill, foundation fill, or anywhere building codes require it. It costs more, but again, this isn't the place to cheap out.
And here's a final tip that'll save you headaches: ask about delivery logistics before you order. Can the truck access your property without tearing up your lawn? Do you need the dirt dumped in a specific spot, or can it go wherever the driver decides? Some suppliers charge extra for precise placement, but it's worth it if the alternative is 20 hours of wheelbarrow work moving dirt across your yard.
Conclusion
So there you have it – everything you need to know about calculating fill dirt for your project. Is it complex? A little. Is it worth getting right? Absolutely. The difference between a successful project and an expensive mess often comes down to proper planning and accurate calculations.
Remember the key principles: measure carefully in consistent units, understand your shape formulas, always account for compaction, and when in doubt, order a little extra. Use the right type of fill for your application, and don't try to save money by skipping proper compaction.
Whether you're leveling a yard, building a patio, or laying a foundation, fill dirt is the invisible foundation that makes everything else possible. Get this part right, and the rest of your project will go smoothly. Get it wrong, and... well, we've talked about what happens then.
The modern approach is to use a reliable calculator tool that factors in all these variables automatically. Punch in your measurements, select your project type, adjust your compaction factor, and get an accurate estimate in seconds. It's not cheating – it's working smart instead of working hard.
Now get out there and build something awesome. Just remember to measure twice and order once. Your budget (and your back) will thank you.
Ready to Calculate Your Fill Dirt Needs?
Use our free calculator above to get instant, accurate results for your project!
Frequently Asked Questions
How do I calculate how much fill dirt I need?
To calculate fill dirt, measure the length, width, and depth of your area in feet. Multiply these three numbers to get Cubic Feet, then divide by 27 to get Cubic Yards. Our free online fill dirt calculator does this instantly for you.
What is the formula for cubic yards of dirt?
The formula is: (Length in feet × Width in feet × Depth in feet) ÷ 27 = Cubic Yards. For example, a 10x10 area that is 3 inches (0.25 ft) deep is (10 × 10 × 0.25) / 27 = 0.93 cubic yards.
How much does a cubic yard of fill dirt weigh?
A cubic yard of fill dirt typically weighs between 2,000 and 2,700 pounds (1.0 to 1.35 tons), depending on moisture content and soil composition. Our calculator uses a standard average of 2,400 lbs per yard.
How many cubic yards are in a dump truck?
A standard dump truck (10-wheeler) holds about 10-14 cubic yards. A smaller transfer truck might hold 5-10 yards, while a large side dump can hold up to 20+ yards.
Why do I need to calculate compaction?
Loose dirt contains air. When you spread and pack it down, it shrinks. To fill a hole completely, you need to order 10-25% more dirt than the hole's volume. Our fill dirt estimate tool includes a Custom Compaction Adjuster for this exact reason.
Can I use this calculator for topsoil or gravel?
Yes. While densities vary slightly, the volume calculation (Cubic Yards) is identical for topsoil, gravel, mulch, and sand. Just keep in mind that gravel might weigh closer to 2,700 lbs/yard and mulch only 800 lbs/yard.
How do I calculate dirt for a slope or wedge?
Select the 'Slope / Wedge' option in our tool. The math for a wedge is Volume = (Length × Width × Depth) / 2. This is essential for driveway ramps or grading away from a foundation.
How many wheelbarrows make a cubic yard?
A standard construction wheelbarrow holds about 3 cubic feet. Since there are 27 cubic feet in a yard, it takes approximately 9 full wheelbarrow loads to move one cubic yard of dirt.
Is this fill dirt calculator free?
Yes, DirtMasters provides a 100% free fill dirt calculator for homeowners and contractors. There are no hidden fees or downloads required.
How do I calculate fill dirt for a circular pool?
Use our 'Circle' mode. Enter the diameter and depth. The formula is π × r² × depth. For a 20ft pool filled 4ft deep, the volume is massive, so accuracy is key to saving money.